
Reviewed · CANYONLANDS & ISLAND IN THE SKY TOURS
Sunrise photography in Dead Horse Point and Canyonlands National Park
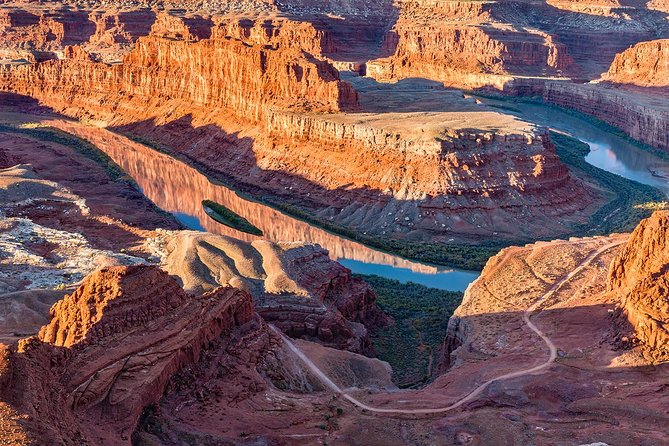
Sunrise in Moab turns photos into memories. This 4–6 hour sunrise photography outing in Dead Horse Point and Canyonlands National Park is built for learning fast, not just taking pictures. You get guided viewpoints, real-time advice on composition, and help dialing in your camera settings while the light is at its best.
I like the small group size capped at six, because it means the guide can actually help you instead of doing a one-size talk. I also like the hands-on photography coaching from your instructor, including patience while you move between spots and adjust settings. Reviews specifically name Colin, and his style is the kind that helps beginners feel steady.
The main drawback is simple: you start at 5:00 am, and some stops require short walks under a mile. Add early-morning cold and an outdoorsy pace, and you’ll want a moderate fitness level to enjoy it.
In This Review
- Key highlights that make this sunrise shoot work
- Why Dead Horse Point + Canyonlands at sunrise is worth the alarm
- Small-group coaching: how Colin-style patience saves your photos
- The 5:00 am plan: how the timing shapes your photos
- Stop 1: Dead Horse Point State Park viewpoints that flatter sunrise
- Stop 2: Canyonlands National Park photo spots, chosen by time and weather
- Corona Arch: a short hike option that adds variety near Moab
- What you’ll actually do with your camera (not just where to stand)
- What to bring for a cold, early shoot in Moab
- Pickup, mobile tickets, and the small details that reduce stress
- Price and value: what $250 buys you beyond the views
- Who should book this sunrise photography tour in Moab
- Should you book Rock Light Photo Tours for sunrise photography?
- FAQ
- FAQ
- What time does the tour start in Moab?
- Where do I meet the guide?
- How long is the sunrise photography experience?
- Is pickup available?
- What is the group size limit?
- Is the Dead Horse Point State Park admission included?
- Do I need a park pass for Canyonlands National Park?
- What’s included for food and drinks?
- Do I need to hike during the tour?
- Can I extend the tour to include Arches National Park?
Key highlights that make this sunrise shoot work
- Group cap of six means you’re not lost in the crowd.
- Dead Horse Point admission included for the best early viewpoints.
- Cold water and snack bars help you stay focused when it’s still chilly.
- Composition and settings help so you can improve, even if you’re new to manual.
- Weather-based flexibility keeps the plan realistic for sunrise conditions.
- Optional Arches National Park add-on if you want more time in the photo zone.
Deeper into Canyonlands and the Island in the Sky
- Canyonlands National Park Half-Day Tour from Moab★ 5.0 · 1,074 reviews
- Canyonlands National Park Backcountry 4×4 Adventure from Moab★ 5.0 · 458 reviews
- Discover The Best Of Moab In A Day: Arches Canyonlands Dead Horse★ 5.0 · 327 reviews
- Canyonlands National Park Needles District by 4×4★ 5.0 · 298 reviews
Why Dead Horse Point + Canyonlands at sunrise is worth the alarm
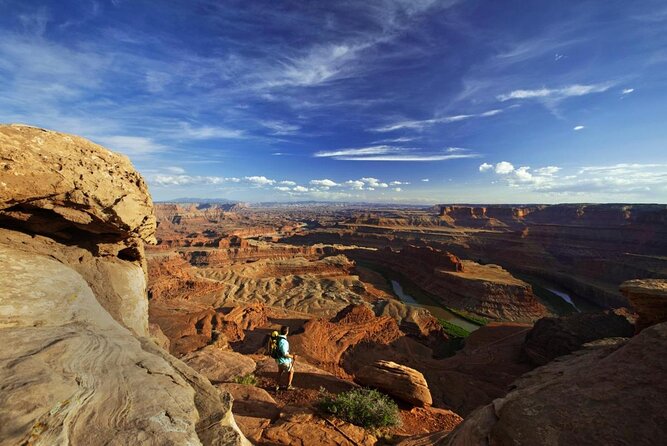
Moab at sunrise can feel like a cheat code for photographers. The colors are softer, shadows are longer, and the rock details look three-dimensional instead of flat. And because the tour is scheduled early, you’re actually there before the views get crowded and harsh.
What makes this experience practical is that you’re not wandering alone. The guide helps you hit several viewpoints and then chooses Canyonlands photo spots based on time and weather. That matters because sunrise light changes quickly, and chasing the wrong viewpoint can waste your best 30 minutes.
There’s also a learning angle here. If you’ve ever taken a few good shots and wondered why, this tour gives you a framework: where to stand, what to include, and how to set up your camera so the photo matches what you’re seeing.
Small-group coaching: how Colin-style patience saves your photos
The biggest value I see is the attention you get. With a maximum of 6 travelers, your guide can slow down for questions and check what you’re trying to do. That’s a big deal for sunrise photography, where you often have to adjust exposure, focus, and framing on the fly.
From the reviews, Colin’s approach stands out: he’s described as patient while walking to different sites and helpful with camera settings. That combination matters because a lot of tours either rush locations or rush instruction. Here, the goal is to help you get the shot and learn the process at the same time.
You’ll also get tips on composition and angles. This is one of those quietly powerful pieces of coaching, because you can own the best camera in the world and still miss the shot if your framing is off. Even small changes like moving a few steps, altering the horizon line, or changing the foreground can make your sunrise images look intentional instead of accidental.
The 5:00 am plan: how the timing shapes your photos
This tour starts at 5:00 am from the Moab Information Center at 25 E Center St, Moab, UT 84532. The early start is not just for dramatic light; it also gives you a smoother schedule. You’ll photograph Dead Horse Point first, then move toward Canyonlands for a couple of photo locations.
The total duration is about 4 to 6 hours, which is long enough to work through a few viewpoints but short enough to keep the sunrise window productive. You’re also offered pickup, which helps if you want to skip the parking and early-wakeup logistics stress.
Because it’s weather dependent, the guide may adjust locations in real time. That flexibility is smart for photography because conditions like clouds, wind, and visibility can make one spot shine while another turns into a foggy mess.
Stop 1: Dead Horse Point State Park viewpoints that flatter sunrise
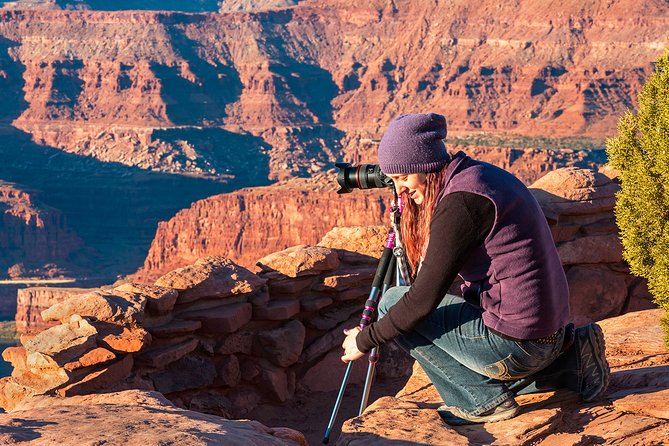
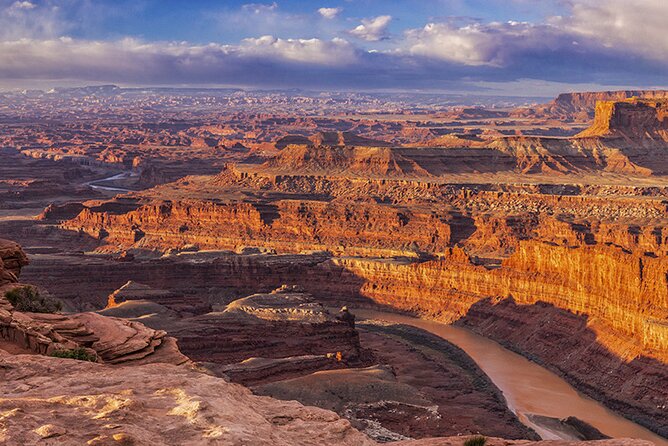
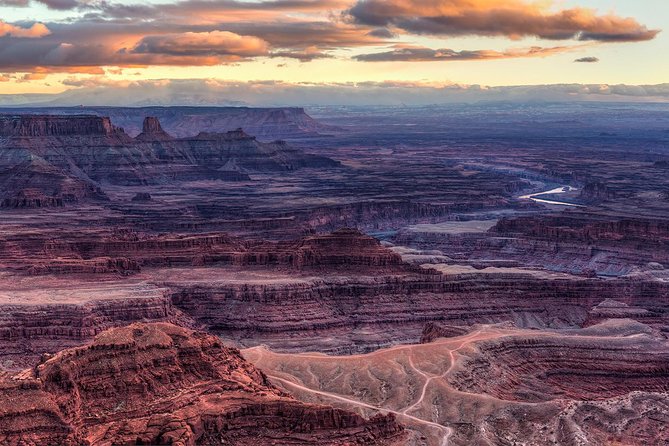
Dead Horse Point State Park is where you’ll put the light to work. You’ll photograph from several viewpoints around the point, with about 1 hour 30 minutes at this stop. Admission is included here, which is a nice cost saver and also means you can focus on shooting instead of figuring out a ticket on a chilly morning.
What you’re really chasing at Dead Horse Point is viewpoint variety. A single overlook can be pretty, but sunrise gets better when you can reposition for foreground, angle, and depth. The tour is structured to let you do that, rather than forcing a quick photo and a fast departure.
A practical note: short walks (under a mile) are required for some locations. That doesn’t sound like much, but in winter-cool conditions at 5:00 am, you’ll feel every step. Wear shoes with real traction and give yourself time to move carefully, especially near edges.
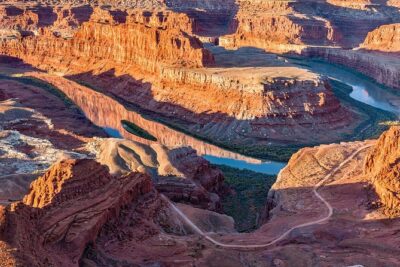
More of the overlook at Dead Horse Point
Stop 2: Canyonlands National Park photo spots, chosen by time and weather
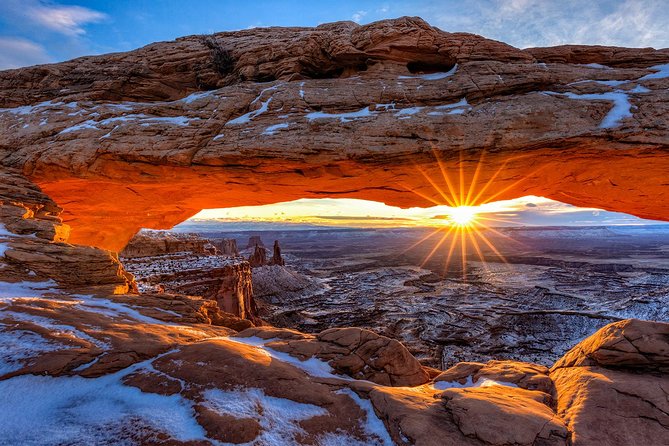
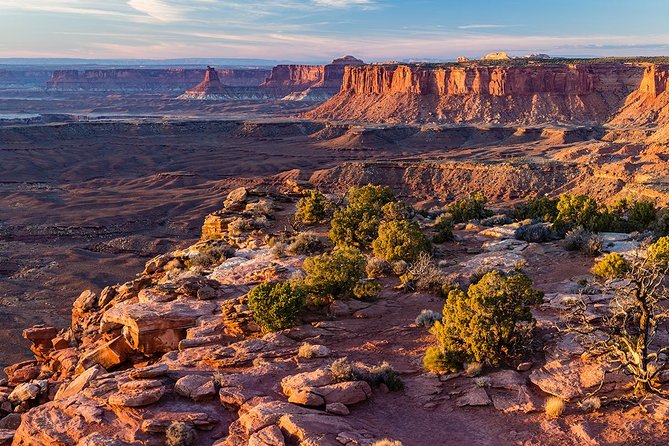
Canyonlands National Park is next, usually with about 2 hours for one or two photo locations. The exact spot count can vary based on weather and timing, which is a sensible approach when sunrise light is changing minute by minute.
One thing to prepare for: you may need your park pass. The tour information says admission to Canyonlands is not included and to bring your park pass. At the same time, the itinerary notes a Canyonlands ticket as free—so the safe move is to assume you should have the park pass with you so you’re not stuck at the gate.
Photographing Canyonlands well usually comes down to choices like:
- What distance you want (near rock texture vs. far formations)
- How you frame the horizon
- Whether you include a foreground element to give the image scale
This is where the guide’s composition coaching becomes useful. If you’re new, it’s easy to point your camera and shoot the obvious view. The coaching helps you build a shot that feels grounded and balanced.
Corona Arch: a short hike option that adds variety near Moab
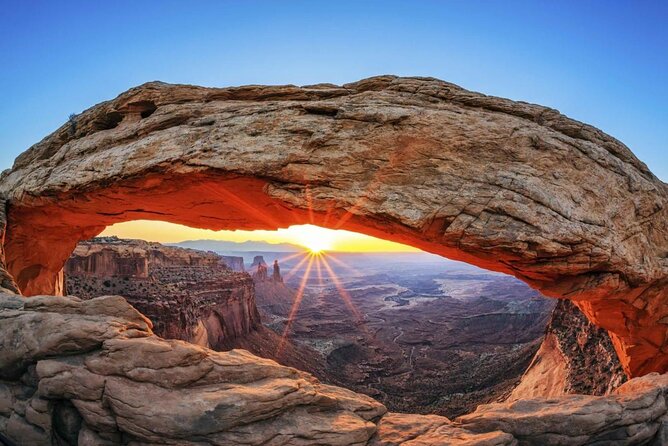
There’s also time in the plan for Corona Arch, a natural sandstone arch near Moab. It’s part of the same rock formation as Pinto Arch and Bowtie Arch, which hints at why the area can look so good for photography in the same general region.
Corona Arch is listed as part of the experience, and the tour info indicates some stops involve short hikes under a mile. So think of this as a bonus scene change: arches add a different shape language than the wide canyons, and sunrise can make sandstone glow from the side.
The advantage of adding an arch photo stop is variety. Dead Horse Point gives you dramatic overlooks; Canyonlands adds scale; Corona Arch gives you a subject with a clear focal point. That mix helps if your goal is a set of images that feel different from each other, not just repeated versions of the same view.
What you’ll actually do with your camera (not just where to stand)
This tour is designed to improve your photography skills, and the help is meant to be practical. You’re guided on composition and taught about your camera’s settings, so you don’t just memorize locations. The goal is that you can take what you learn and apply it to other sunrise shoots around the Southwest.
If you’re a beginner, the guidance is especially valuable because sunrise photography often punishes inexperience. Light is low but changing quickly; contrast can swing; and it’s easy to end up with blurry shots if you’re not set up correctly.
From the reviews, a key strength is how the guide works with your actual setup. Colin is described as helping with camera settings and being patient while you adjust as you walk to new angles. That makes a big difference if you’re trying to learn while also managing the physical demands of an early morning.
What to bring for a cold, early shoot in Moab
Even though the tour provides cold water and snack bars, you should still pack like it’s early and outdoors. Sunrise in Moab can feel chilly, especially before the sun clears the rocks, and you’ll be outside moving between viewpoints.
Here’s what I’d bring based on how the tour runs:
- A camera setup you’re comfortable adjusting (so you can take the setting help seriously)
- Layers you can peel on the move (sunrise warmth can arrive fast)
- Comfortable shoes for short walks near overlooks
- Your Canyonlands park pass since entry guidance says to bring it
- Basic headlamp or phone light for the walk and setup before light arrives
If you have a tripod, consider bringing it if you use one regularly. Sunrise is one of those times when longer exposures can pay off, but only if you can set up safely and steadily.
Pickup, mobile tickets, and the small details that reduce stress
I appreciate that the tour offers pickup, because the biggest hassle on a 5:00 am start is getting to the right place awake and on time. Meeting at the Moab Information Center keeps it simple, and the mobile ticket makes check-in less chaotic.
Group size also helps stress levels. When there are only up to six people, you spend less time coordinating and more time focusing on shots and learning moments. In the real world, that can be the difference between leaving with a handful of good photos and leaving with a clear sense of how to improve.
Price and value: what $250 buys you beyond the views
At $250 per person, this is not a cheap drive-and-stand type of tour. But it’s priced like an actual workshop: a local photographer guide, small group limits, and time spent coaching your camera choices.
You’re also getting some direct value in what’s included. Dead Horse Point State Park admission is included, and you’ll have cold water and snack bars during the morning. That might not sound dramatic, but it keeps you going when you otherwise would ration your own snacks or add an extra cost before you even start shooting.
The coaching is the main reason the value holds up. A guide who helps with settings and composition can save you from months of trial-and-error. Even if you’re brand new, the chance to learn while standing at the right spot at the right moment is what you’re paying for.
If you want to extend, there’s an option to add Arches National Park for a full-day experience on request. That can stretch your day and give you more scenes with the same guide, which can improve your odds of getting a fuller set of images.
Who should book this sunrise photography tour in Moab
This tour fits best if you want structured learning without a big class feeling. You’ll probably enjoy it if:
- You’re new to photography or want better sunrise results
- You like guidance with composition and camera settings
- You prefer a small group and real Q&A time
- You can handle short walks under a mile on uneven ground
It may be less ideal if you hate early mornings or you want a long, slow hike. This experience is about early light and efficient photo stops, so it’s not built for all-day wandering.
Weather matters too. The tour is described as requiring good weather, and if conditions are poor, you’ll be offered a different date or a full refund. That’s fair, but it also means you should be flexible.
Should you book Rock Light Photo Tours for sunrise photography?
If your goal is to leave with better photos and a better process, I’d lean yes. The mix of small-group coaching and real sunrise timing gives you both the images and the learning.
Book it if you value hands-on help, like the kind Colin provides in the reviews, and if you’re willing to get up early and walk short distances. Skip it if you want a do-it-yourself sunrise with zero instruction or if early starts feel like a deal breaker.
FAQ
FAQ
What time does the tour start in Moab?
The start time is 5:00 am.
Where do I meet the guide?
You meet at the Moab Information Center, 25 E Center St, Moab, UT 84532.
How long is the sunrise photography experience?
It runs about 4 to 6 hours.
Is pickup available?
Yes, pickup is offered.
What is the group size limit?
The tour has a maximum of 6 travelers.
Is the Dead Horse Point State Park admission included?
Yes, admission for Dead Horse Point State Park is included.
Do I need a park pass for Canyonlands National Park?
Bring your park pass. Admission to Canyonlands is noted as not included.
What’s included for food and drinks?
Cold water and snack bars are provided.
Do I need to hike during the tour?
You should have a moderate fitness level, and short hikes of less than 1 mile are required for some locations.
Can I extend the tour to include Arches National Park?
Yes, there is an option to extend to a full-day experience by adding Arches National Park on request.
Red Rock at Golden Hour
- Hell’s Revenge Sunset Off-Road Hummer Adventure
★ 5.0 · 129 reviews - Moab: Colorado River Sunset Boat Tour with Optional Dinner
★ 4.7 · 115 reviews - 3-Hours Sunset Arches National Park Pavement Sights Tour
★ 4.5 · 94 reviews - Moab: Arches National Park Sunset Tour
★ 4.8 · 76 reviews - Sunset Tour, Moab, Off-road and Scenic Backcountry
★ 4.5 · 51 reviews
Out at Dead Horse Point
- Discover The Best Of Moab In A Day: Arches Canyonlands Dead Horse
★ 5.0 · 327 reviews - Moab: 3-Hour Jet Boat Tour to Dead Horse Point State Park
★ 4.7 · 81 reviews - Electric Dirt Bike Tour, Shafer Trail, Canyonlands, Deadhorse
★ 5.0 · 39 reviews - E-Bike Private Half-Day Dead Horse Point Mountain Biking Tour
★ 5.0 · 27 reviews
More of Canyonlands
- Canyonlands National Park Half-Day Tour from Moab
★ 5.0 · 1,074 reviews - Canyonlands National Park Backcountry 4×4 Adventure from Moab
★ 5.0 · 458 reviews - Discover The Best Of Moab In A Day: Arches Canyonlands Dead Horse
★ 5.0 · 327 reviews - Canyonlands National Park Needles District by 4×4
★ 5.0 · 298 reviews - From Moab: Full-Day Canyonlands and Arches 4×4 Driving Tour
★ 4.9 · 289 reviews
Fresh Off the Trail: Newest Moab Reviews
- Discover The Hidden Arches: Solitaire Arches Hike & 4×4 Fun
★ 5.0 · 4 reviews - Moab: Zip Line Adventure
★ 5.0 · 4 reviews - Canyon Country Sunset Helicopter Tour – 60 minutes
★ 5.0 · 4 reviews - Canyonlands National Park Self-Guided Audio Tour
★ 4.0 · 5 reviews - Moab: Canyon Country Sunset Helicopter Tour
★ 4.2 · 5 reviews - Canyoneering Morning Glory Arch
★ 5.0 · 5 reviews
Canyonlands & Island in the Sky Tours, compared.
 ★ 5.0Canyonlands National Park Half-Day Tour from MoabFrom $1961,074 reviews
 ★ 5.0Canyonlands National Park Backcountry 4×4 Adventure from MoabFrom $210458 reviews
 ★ 5.0Discover The Best Of Moab In A Day: Arches Canyonlands Dead HorseFrom $399327 reviews
 ★ 5.0Canyonlands National Park Needles District by 4×4From $353298 reviews
 ★ 4.9From Moab: Full-Day Canyonlands and Arches 4×4 Driving TourFrom $337289 reviews
 ★ 4.9From Moab: Sky District Canyonlands National Park 4×4 TourFrom $196234 reviews
 ★ 5.0Arches and Canyonlands 4X4 Adventure from MoabFrom $336234 reviews
 ★ 4.5Moab Combo: Colorado River Rafting and Canyonlands 4X4 TourFrom $264221 reviews
Browse the lists this tour appears in